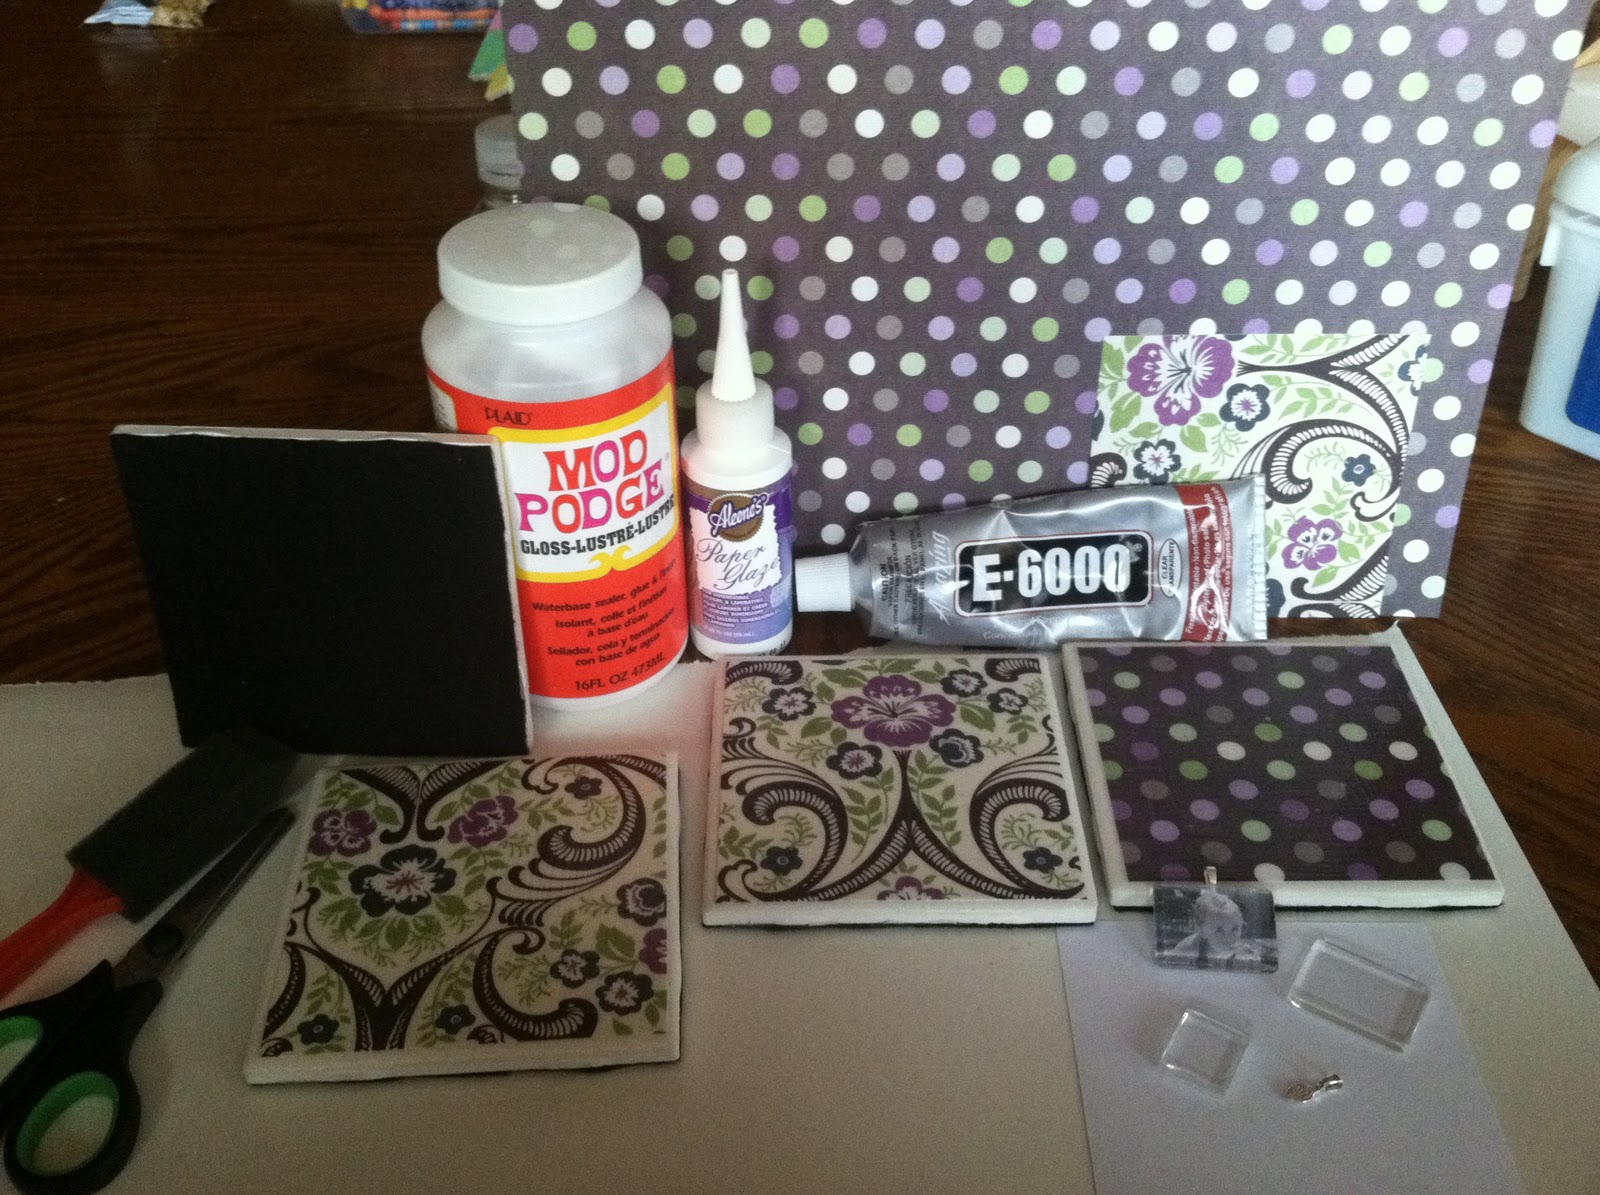
Coaster and Pendant Materials, minus clear spray paint.
COASTERS:
Materials Needed:
4x4 tiles, (Lowe's Flooring Dept. around $0.16 each)
Scrapbook Paper OR Photos--(photos are next on my list)
Mod Podge
Scissors
Felt
E-6000 (I'm trying a hot glue gun next).
Foam Brush
Clear Spray Paint--not pictured.
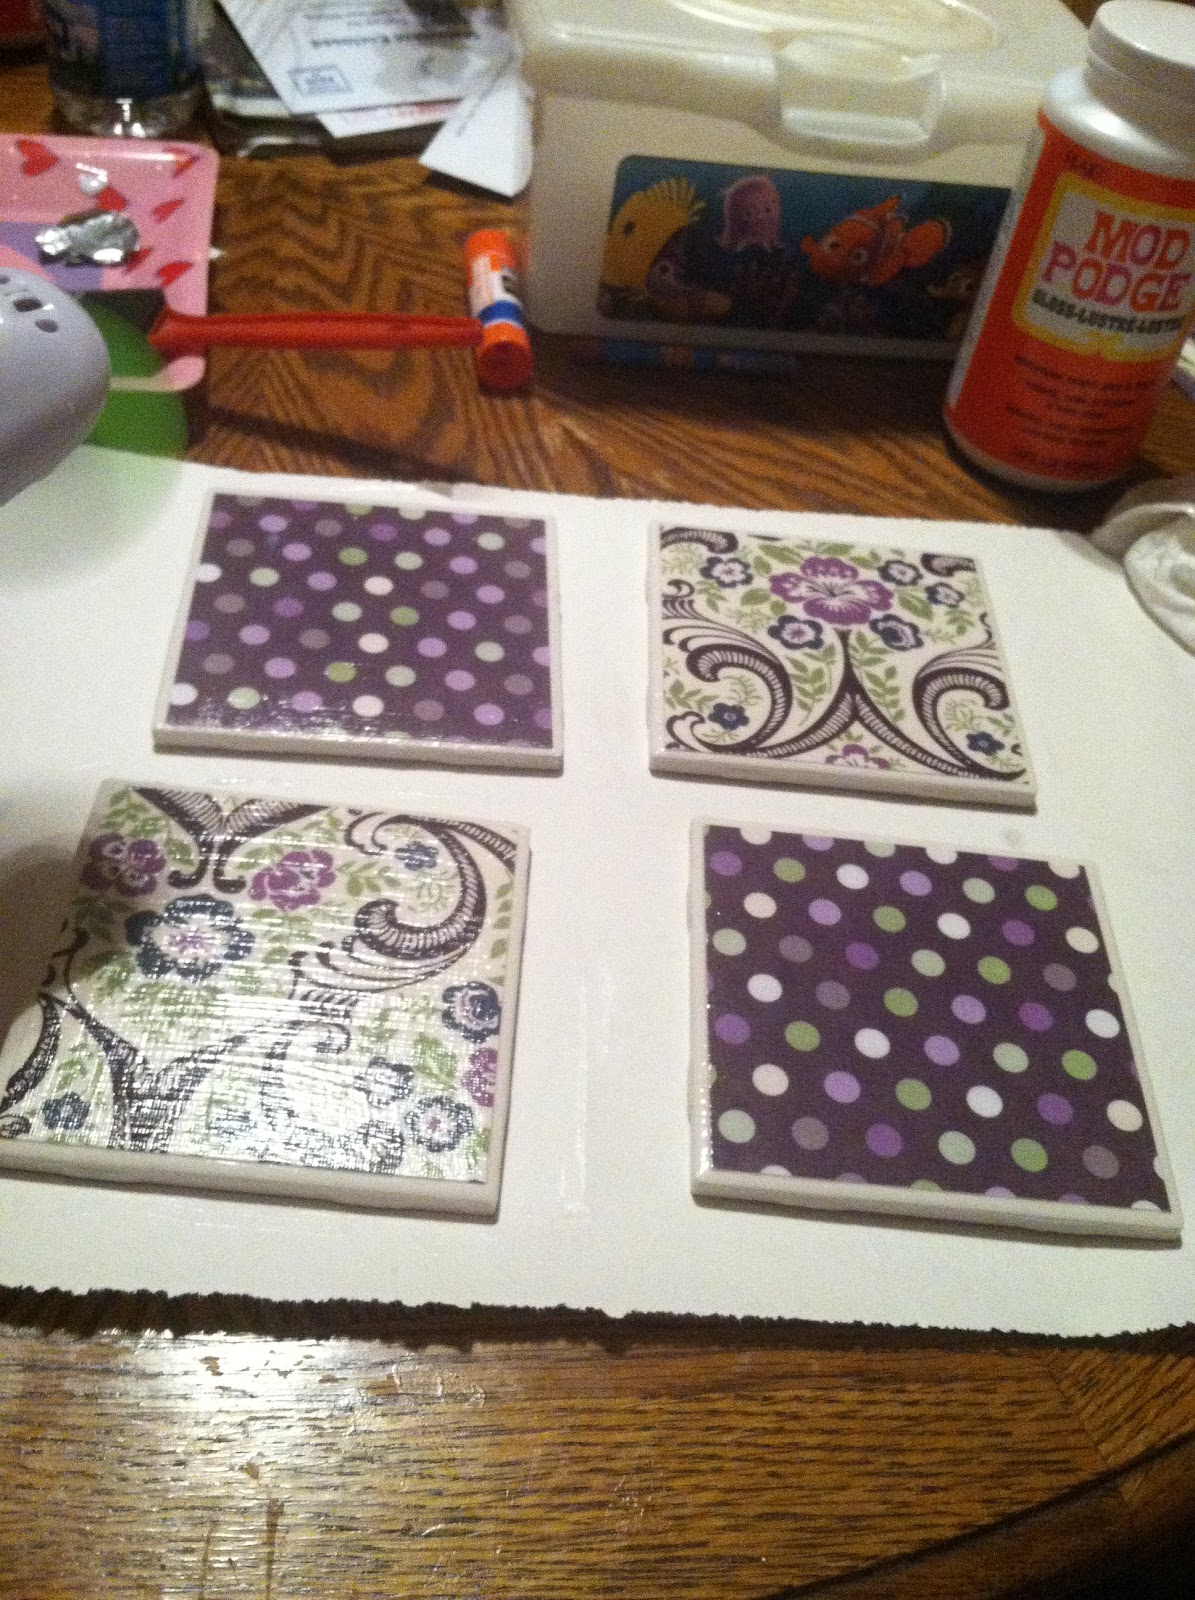
*Start by cutting your scrapbook paper or photo down to a 4x4 square.
*Next, Use the foam brush to brush a layer of Mod Podge over the tile. Make this layer thin.
*Place the scrapbook paper or the photo onto the Mod Podge and press down firmly. Smooth it out so that there are NO lumps or bubbles.
*Next, use your foam brust to paint a layer of Mod Podge over the top of the paper or photo. Try to make it smooth. It does dry clear, but it will be textured if it's not smooth, which I really liked, but others may not.
*Once that is dry, it will be clear so you will know, then do it again. Add about 4 layers of Mod Podge to your tiles. It takes around 20-30 for each layer to dry throughly.
*After the top is complete, cut the felt to 4x4 squares for the back. I found it easiest to hold a tile on the felt and cut around it and trim it later. (that's gonna be bigger than 4x4).
*Use the E-6000, I'm trying a hot glue gun next time, to attach the felt to the bottom of the tile to protect surfaces.
*Once that is dry trim the extra off so that you can't see it while it sits on the table.
*In the next day or two, after the Mod Podge has had time to really dry throughly add a coat of clear spray paint. I have not done this yet because I just did my coasters last night so that will probably happen tomorrow night for me. :)
I am not making a direct link to the original how to on these coasters because when I click it on Pinterest to take me to the blog it is not there. Basically, I'd be wasting your time. :)
PENDANTS:
Materials Needed:
Glass tiles, Purchased from Sun and Moon Craft Kits
Metal Bails, Also purchased from Sun and Moon Craft Kits
Photo, or scrapbook paper
Paper Glaze
E-6000
Scissors
Small Brush
First, I have to shout out to Sun and Moon Craft Kits. I am in no way, shape, or form affliated with them, but when I get great service I tend to brag about it. I ordered my tiles and bails on a Thursday and they were here a few days later on Monday. Super fast shipping and the coast is VERY afforable! I think I paid $5 for 20 tiles and the bails were just $0.14 or $0.16 each. Seriously, order from them! :)
Ok, onto the how-to!
*Select your photo and print. I used Windows Live Photo Gallery because when you select print from there and one of the options is print size and there is an option that has a page of little tiny pictures. OR you can cut a piece of scrapbook paper down to fit.
*Clean your tile
*Cut your photo so that it fits the bottom of your tile. I made mine a hair smaller so that there is a clear edge around it so that later I could seal the edges good.
*Use the Paper Glaze and apply to the bottom of the tile. I just put a blob in the center.
*Next, stick the tile onto the FRONT of the photo. Here is where I squished it around some to cover the photo and the back of the tile completely. The extra cleans up easily with a wet wipe or rag as long as you do it right away. TRY TO NOT GET THE PAPER GLAZE ON THE FRONT OF THE TILE AT ALL!!! I am sure it will clean up if you do the clean up immediately, but why risk it really...
*Let that dry
*Once it is dry brush a thin layer of Paper Glaze over the back of the photo. Make sure you cover the edges of the photo too because this is going to seal it and make it water proof. (I've not had mine in water, but that is what I was told)!
*Let that dry
*Paint more layers of Paper Glaze onto the back. I probably used 5-6 layers because mine were very thin. Make sure to let it dry completely between layers!
*Use the E-6000 to attach the metal bail to the back of the photo. This needs to sit for about 24 hours to cure before doing anything else. If you don't let it set up then it's not going to bond right...trust me, I know!
*Next, add a couple of more layers of paper glaze over the back again and over the bail. I am not sure you HAVE to do this, but I feel it gives it more hold. Again, let it dry completely between layers.
*Attach to a necklace or bracelet and enjoy!

I couldn't get a great shot of mine, but you get the point.
Click HERE if you want the original directions from Pinterest.
Ok, so there you have it. Two VERY afforable, very nice, could be very personal craft ideas! I am very excited for the Christmas season now because my friends and family are getting some more homemade crafts! Yes, I know it's only February! :)

**Coaster Update 1.16.13**
I have found that instead of cutting and gluing felt to the bottoms of the coasters, it is easier to buy the felt pads from the hardware section on your local store that goes on the bottom of furniture to protect your floors works better. I bought 160 from Wal-Mart for $9 and some change!
I'm updating from my phone so I hope the picture uploads in the right spot!


No comments:
Post a Comment